Our new dog Prewash has been surprisingly (to me) non-chewy for a new dog, but she's still managed to consume and create holes in some of our belongings. This sock, which is a SmartWool sock that my sister gave me as a gift, was one of her early victims.
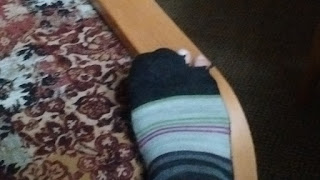 |
| My little toes are coming out for air. |
For a while I "fixed" the problem by wearing the sock only on my right foot, so that that hole on the right wouldn't line up with my big toe. But eventually even my small toes started poking out, so I decided to use one of my favorite sock "darning techniques" from the awesome book,
The Tightwad Gazzette.
The process isn't actually darning, it's patching -- but today is
Talk Like a Pirate Day so I feel like I need to say "Darrrrrr-n sock, matey!" You need a sacrificial patch of fabric (I used a scrap from a purple-tshirt-turned-rag), plus a needle, thread, and scissors. It also helps to have a wooden egg, or a hard small ball, to stick in the sock to sew against. I have a wooden egg painted in cow colors that I keep in my sewing basket for just this purpose.
 |
When I started darning socks, I realized,
"Oh, that's what all those wooden eggs are for!" |
You stick the patch and the egg into the sock, so that the patch goes all the way across the hole, and then use the needle and thread to sew around the hole, fastening the sock to the patch on the outside.
 |
| Stitch around the hole. Don't mind the dog hair. |
Then turn the sock inside out, without yet cutting the thread. I always use a patch much bigger than the hole, because it's easier to make sure the whole hole is covered. So once I turn the sock inside out, I cut off the excess, leaving about 1/4 to 1/2 inch of fabric around the existing stitching.
 |
Cut off the excess (purple) patch without accidentally
cutting a new hole in the sock. |
And then I stitch around the patch, fastening the newly trimmed edges to the sock. The egg of course has now moved to the inside, making it easier for me to do the holding and stitching.
 |
| Stiching around once more. |
This whole process takes
maybe 10 minutes, and usually 5. That's faster than going to a store -- and it's definitely cheaper. I don't know that I'd do this with my running socks, which seem to reproduce in my drawers like bunnies, but I have exactly 3 pairs of these very nice SmartWool socks, and they're nice enough that I'd like to keep them around. So 10 minutes of time on a sunny Sunday afternoon seems more than worth it for preserving a pair of my favorite socks.
And that's the hole post.


hah! clever save.
ReplyDeletejust this morning, I was contemplating 2 patches for 2 large-ish, worn spots on the bottoms of a pair of favorite socks (rather than darning/reweaving)
I've got some holey socks that need this method soon. Thank you!
ReplyDeleteAnd love for Tightwad Gazette. I have all three compilations and adore them.
Oh, thanks for the tutorial. I wonder about lumpiness and blisters, though. Your added fabric at least looks soft. And no edges are folded under, so it's only a double-layer ring.
ReplyDeleteCurrently I usually just stitch the edges of the hole to each other, though my holes are from wearing through and not doggie snacks, so I probably have more fabric to work with. But sometimes I do develop a pretty big hole in the heel for which this method might be ideal.
Lumpiness and/or blisters hasn't been a problem, either for me or for my husband (I do this with his pricey bike socks, when he asks). T-shirt fabric, as you point out, it pretty soft.
DeleteI hadn't even thought about that, honestly, but I can see that it could be problem for some socks (or some people).
Nice, I will definitely add this to my list of things to try!
Delete